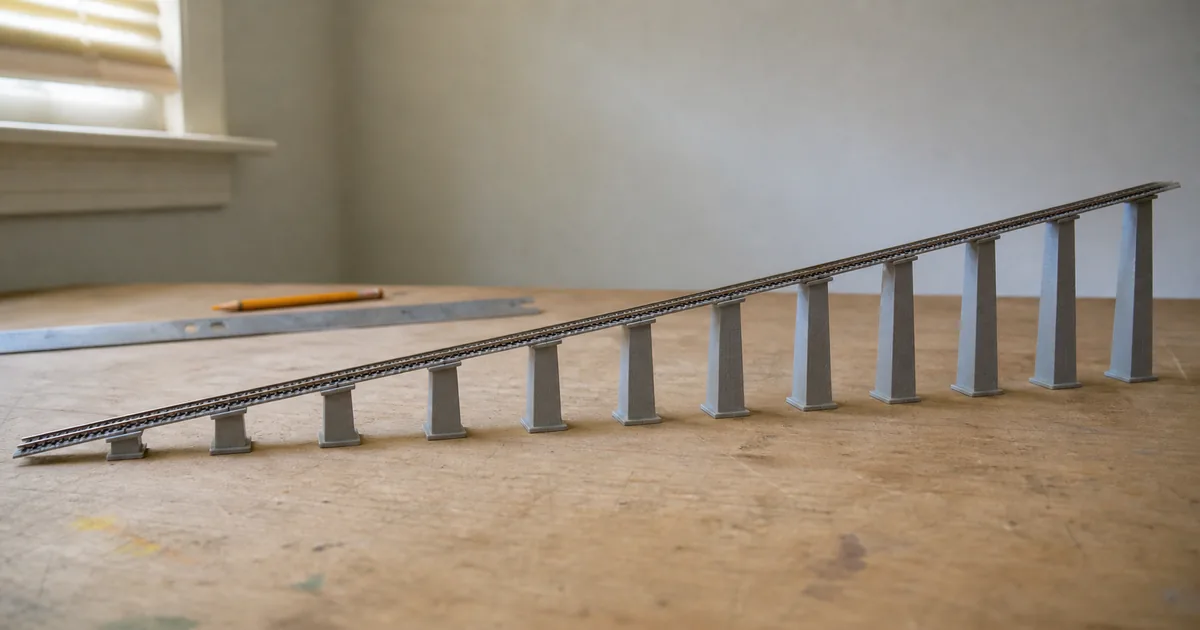
AI-generated illustration, not a photograph of a specific product
Every multi-level layout runs into the same arithmetic. Getting the track up is trivial — piers do that. What decides whether the idea works is how much horizontal distance you have to spend getting there, and that number is almost always larger than people expect.
The formula, and the two lengths people confuse
Grade (%) = rise ÷ horizontal run × 100
Angle (°) = arctan(rise ÷ run) · Ratio = 1 : (run ÷ rise)
Slope length = √(run² + rise²) — the actual length of track laid on the incline
Two distinct lengths matter here. The horizontal run is the projection on your baseboard — the distance the ramp eats from your available space. The slope length is how much track you physically lay. At model railway grades these differ by a fraction of a percent (at 4% over 50 mm, 1,250 mm versus about 1,251 mm), so they look interchangeable — but the definitions are not, and mixing them up in a spreadsheet will bite you eventually.
Interactive calculator
Pick whichever pair of values you already know. Results show grade, horizontal run, slope length, angle and ratio; curve mode uses the track centerline arc length.
A 50 mm rise at 2% to 4%
The same rise, compared across grades. Note how little the slope length differs from the horizontal run — and that they are still not the same quantity.
| Target grade | Horizontal run | Slope length | Angle / ratio |
|---|---|---|---|
| 2% | 2,500 mm (98.4 in) | about 2,500.5 mm | about 1.15° / 1:50 |
| 2.5% | 2,000 mm (78.7 in) | about 2,000.6 mm | about 1.43° / 1:40 |
| 3% | about 1,666.7 mm (65.6 in) | about 1,667.4 mm | about 1.72° / 1:33.3 |
| 3.5% | about 1,428.6 mm (56.2 in) | about 1,429.4 mm | about 2.00° / 1:28.6 |
| 4% | 1,250 mm (49.2 in) | about 1,251.0 mm | about 2.29° / 1:25 |
Pure geometric conversion. It does not include any vertical easement you choose to add at the top and bottom of the ramp, and it is not a guarantee that a given train will climb it.
Read that table next to the size of your board and the point lands: even 4% — a steep grade by prototype standards — spends nearly 50 inches of run to gain 50 mm. That is why multi-level schemes are so much harder on a small table than they look, and why a helix exists at all.
The grade-budget ledger: calculate the route, not just the slope
A calculator can prove the constant-grade middle and still leave an impossible layout. Make one ledger that reserves every length before you commit the lower and upper track plans:
| Budget line | What to record | Stop condition |
|---|---|---|
| Required rise | Installed upper structure plus measured vehicle clearance and a chosen construction margin | You used nominal pier height as free space |
| Bottom transition | Track length that changes gradually from level to the target grade | A coupler or underframe changes angle abruptly |
| Constant-grade run | Horizontal straight run or curve-centerline arc length from the calculator | The route is shortened to fit after the percentage was chosen |
| Top transition | Track length that returns gradually to level before a turnout, platform or joint | A turnout begins inside the changing slope |
| Access and rescue | Reach, cleaning and derailment access along hidden or elevated track | A stalled train cannot be reached without damage |
NMRA beginner guidance explicitly calls for reasonable grades, smooth transitions at both ends and sufficient over-track clearance. It also warns that grades above 2% significantly affect locomotive performance and train length. That is a planning warning, not a claim that 2% is a universal pass/fail limit; KATO's own 4% reference shows why manufacturer context and a real train test still matter.
There is no universal maximum grade
KATO describes 4% as the standard climbing grade for its N scale products. That is a useful reference, but it is not a maximum that every vehicle, brand and formation is guaranteed to manage. What you can actually run depends on the locomotive, how many cars are behind it, the curves the ramp passes through, the condition of the railhead, and how well maintained the stock is.
Two practical consequences. First, a long train needs a gentler grade than a short one — a locomotive that walks up 4% solo may struggle badly with ten cars. Second, curves and grades compound: a curved ramp is harder than a straight one at the same percentage, because curve resistance adds to the climb. If your ramp has to curve, be more conservative.
Curved ramps: use the arc length
The common error is to compute a curved ramp from the diameter or the straight-line distance between its ends. Use the arc length of the track centerline:
Arc length per section = π × radius × angle ÷ 180
Grade % = rise ÷ (arc length × number of sections) × 100
The calculator's curve mode does exactly this. A helix is the same idea taken to its conclusion: each full turn gives you 2πr of run, so the helix radius sets how much rise you can gain per turn at an acceptable grade — which is precisely why helices are physically large.
What KATO and TOMIX actually publish
Two specifics worth getting right, because both are widely misquoted:
- KATO's 4% is presented as its standard climbing grade, and its ramp pier documentation gives geometric examples — for instance five 248 mm sections rising 50 mm gives about 4%, while five 186 mm sections rising the same 50 mm gives about 5.4%. Seeing 5.4% in an example does not mean KATO recommends every train run at 5.4%; it is simply what those numbers produce.
- TOMIX P1–P10 piers step from 10 mm in 5 mm increments to 55 mm at P10, and work with the separately sold 3020 step part. Those heights cannot by themselves give you a grade, because grade also depends on the horizontal spacing between piers — and TOMIX does not publish one standard percentage that applies to every configuration. Do not present a figure you derived from an assumed spacing as a TOMIX specification.
One more distinction that trips people up: the P10 pier is marked 55 mm, while TOMIX's NXF manual gives 58 mm as the installed viaduct height once the 3 mm coupling is added. Pier marking, installed viaduct height, railhead level difference and the clearance under the bridge are four different measurements. Measure the narrowest point after assembly rather than assuming the pier height is usable space.
For the part numbers, prices and which pier sets do what, see radius and layout size for the board side of the problem, and lay the ramp out in the track planner to see how much of your straight it consumes.
Six steps from clearance target to a Go/No-Go grade
- Define the required rise. Measure the complete installed structure and the tallest train below; do not substitute pier height for usable clearance.
- Reserve transition space. Allow straight or gently changing track at the bottom and top for vertical easements before assigning the constant-grade run.
- Calculate centerline run. Use horizontal run for straights and centerline arc length for curves, keeping all measurements in the same unit.
- Build a temporary grade. Support the full route securely but leave it adjustable, including every curve and transition in the final plan.
- Test the governing train. Run the intended locomotive and longest or heaviest formation uphill from a standing start and downhill at low speed.
- Record a Go or No-Go verdict. Accept only repeatable climbs, controlled descents, reliable coupling and full clearance; otherwise lengthen or simplify the route.
Go: geometry
Required clearance is measured after assembly; the complete route fits with both vertical easements and access left intact.
Go: uphill
The governing train restarts on the grade and repeats the climb without wheel slip, uncoupling or loss of electrical pickup.
Go: downhill
Low-speed descent remains controlled; cars do not compress into derailment and couplers stay aligned through transitions.
No-Go
Any scrape, stall, runaway, coupler bind or inaccessible failure sends the design back to more run, more radius, less rise or a shorter train.
Railway-culture answer: a steep grade changes the railway, not only the math
Odakyu Hakone's official guide describes the Hakone Tozan Railway, opened in 1919, climbing gradients up to 80‰ — 8% — with switchbacks as a defining feature. That does not make 8% a sensible generic model-railway target. It shows the opposite: extreme terrain drives a whole operating and engineering identity. On a model, a deliberately difficult climb can justify short trains, special traction or helper operations, but only if that is the railway you intend to operate.
Hakone: when the grade becomes the operating story
Open the note to connect 80‰, switchbacks and short mountain-railway operation to a layout design choice.
Sources
Checked 2026-08-24. Grade figures, pier heights and the standard-climbing-grade description follow NMRA, KATO and TOMIX official pages and manuals. Calculated values here are geometric conversions from the formulae above; inch equivalents are converted at 25.4 mm. No figure on this page is a guarantee that a particular locomotive and formation will climb a given grade — prove that with the train you actually run.
- NMRA: Beginner's Guide Part 2 — vertical easements, clearance and the performance impact of grades above 2%
- NMRA Data Sheet D1j: Grades and Angles — grade formula and conversion reference
- KATO UNITRACK piers — ramp pier sets and the published geometric examples
- TOMIX 3234 PC ramp piers P1–P10 — the 10 mm to 55 mm step range and the separately sold 3020 step
- TOMIX NXF manual: Viaducts — P10 at 55 mm and 58 mm installed height with coupling
- Odakyu Hakone: Hakone Tozan Railway — 1919 opening, 80‰ gradient and switchbacks
See how much of your board the ramp eats
Frequently asked questions
What is the maximum grade for N scale?
There is no maximum that applies across brands and models. KATO describes 4% as the standard climbing grade for its N scale products, but what your layout can actually manage still depends on the locomotive, the length of the train, the curves, the railhead condition and how well maintained the stock is. Treat any published figure as a reference point and prove it with the formation you actually intend to run.
How long a run does a 50 mm rise at 4% need?
1,250 mm of horizontal projection, with an actual slope length of about 1,251 mm — roughly 49 inches. That is a geometric result, not a guarantee that any given train will climb it.
How long a run does a 50 mm rise at 3% need?
About 1,667 mm of horizontal distance, with a slope length of about 1,667.4 mm — roughly 66 inches. This figure does not include any vertical easement you choose to add at the top and bottom of the ramp.
Is a 4% grade the same as 4 degrees?
No. 4% is about 2.29 degrees, a ratio of 1:25. Percentage is rise divided by horizontal run; the angle comes from the arctangent of that ratio. Mixing the two up is a common way to end up with a ramp roughly twice as steep as intended.
How do I calculate a grade on a curve?
Use the arc length of the track centerline, not the chord or the diameter. Arc length is pi x radius x angle / 180 for each curved section, multiplied by the number of sections. Then divide the rise by that total arc length and multiply by 100 for the average grade percentage.
Is KATO's 4% a guaranteed figure?
No. KATO presents 4% as its standard climbing grade, which is not the same as a maximum every vehicle, brand and formation is guaranteed to manage. Longer trains, tighter curves and heavier loads all reduce what is realistically achievable.
Is TOMIX P10 55 mm or 58 mm?
Both figures are real but describe different things. The P10 pier itself is marked 55 mm; TOMIX's NXF manual gives 58 mm as the installed viaduct height once the 3 mm coupling is added. Pier marking, installed viaduct height, railhead level difference and clearance underneath are four separate measurements and should not be substituted for one another.
Does pier height equal the clearance a train needs underneath?
Not necessarily. The bridge or viaduct structure, the roadbed, the track itself and the vehicle passing below all affect the real clearance. Measure the narrowest point after assembly rather than assuming the pier height is available space.
Why does an incline need vertical easements?
A vertical easement changes the slope gradually at the bottom and top instead of creating an abrupt hinge. NMRA beginner guidance specifically says to leave room for smooth transitions. The exact length is layout- and vehicle-dependent, so include both transitions in a temporary full-route test rather than inventing a universal number.
Does N scale change the grade percentage formula?
No. Grade percentage is still rise divided by horizontal run times 100, regardless of scale. N scale changes the physical clearance, curve radius, vehicle mass and traction involved, but it does not change the geometry formula.
How should I test an N scale grade before fixing it permanently?
Build the complete route temporarily, including curves and vertical transitions. Test the intended locomotive with the longest or heaviest formation uphill from a standing start and downhill at low speed, in both directions where applicable. Accept only repeatable operation and reliable coupler behavior.
Should I add curve resistance to the calculated grade percentage?
Keep the geometric grade and the operating burden separate. Use centerline arc length to calculate the real geometric percentage, then treat the curve as an additional operating load verified with the actual train. Do not present an unverified effective-grade correction as a manufacturer guarantee.