Ballast is visually powerful because it joins the rails to the landscape. It also raises the cost of every later track change. The useful question is therefore not simply “how much glue?” It is whether the track, wiring, turnout movement and maintenance access have already earned the right to be sealed into scenery.
Do Unitrack, Fine Track and flex track need the same treatment?
No. Molded-roadbed track such as KATO Unitrack or TOMIX Fine Track can operate without added loose ballast. Extra stone changes the shoulder, texture and color transition, but it can also lock together joints that were meant to remain serviceable. Flex track has a different construction, yet ballast adhesive should still not be used as a substitute for fixing, aligning and testing the track itself. The NMRA track-laying guide puts track fixing, wiring and painting before ballasting.
| Track situation | What ballast adds | Decision before glue |
|---|---|---|
| KATO Unitrack or TOMIX Fine Track | A less plastic-looking shoulder and a better transition into the ground surface | Keep joiners, feeders and module boundaries removable where the layout depends on them |
| Flex track on a fixed layout | The roadbed profile and scenic finish after the track is independently fixed | Complete alignment, wiring, curve and full-train tests first |
| Portable or temporary layout | Potentially more realism, but less reversibility | Prefer a removable scenic edge or no glue across section joints |
| Turnout, bridge or access hatch | Only the minimum appearance treatment the location can tolerate | Preserve movement, electrical contact, lifting and future repair access |
Choose the grain by actual size, not the word on the bag
Fine, Medium, Nano and Small are product-family names, not a shared measurement standard. KATO labels its Nano ballast for N scale and Small for HO, while Woodland's own chart uses Fine, Medium and Coarse across more than one modelling scale. Read the chart for the brand you are buying and inspect the actual grain against a vehicle and tie spacing before committing to a full layout.
Scale is another boundary. KATO's overview notes that Japanese-outline N gauge is commonly 1:150, while Shinkansen and many overseas prototypes are 1:160. Always use the model's label. For a sense of proportion only, an RTRI Japanese technical example describes real railway ballast of roughly 20–60 mm:
| Real particle in that example | At 1:150 | At 1:160 | How to use the number |
|---|---|---|---|
| 20 mm | 0.133 mm | 0.125 mm | A visual scale reference only. It is not a global railway standard or a universal buying specification. |
| 60 mm | 0.400 mm | 0.375 mm |
Color also comes from a place and a date. Quarry source, weathering, brake and rail deposits, maintenance history and local ground all matter. Use photographs of the route and era you model instead of assuming “main line grey” or “branch line brown.” A small dry sample beside the track is more informative than the color shown on a screen.
There is no universal ballast-glue recipe
The most important product decision happens before the ballast is poured. Search results often collapse several chemically and procedurally different systems into one white-glue ratio. The manufacturers do not. Identify the exact adhesive, read its label, and prove it on the same ballast and base material you will use on the layout.
| Adhesive route | Dilution | Pre-wetting | Safe interpretation |
|---|---|---|---|
| Woodland S191 Scenic Cement | None; Woodland calls it ready to use | It already contains a wetting agent; Woodland's ballast instructions use Scenic Cement itself to mist and then saturate | Do not add water or dish soap; clean the rails before operation |
| KATO 24-391 Ballast Glue | Follow the exact product instructions | KATO explicitly says prior water spraying is unnecessary | Do not insert a generic wet-water step into this workflow |
| A product sold as a concentrate | Use only the ratio on that exact label | Use only the method specified for that product | “Concentrate” and “ready to use” are not interchangeable descriptions |
| Generic PVA or matte-medium method | The NMRA example adds water to about milk-like consistency; it does not give a universal 1:1 or 1:3 formula | The NMRA example uses wet water first | Treat this as one documented method, not a rule for every brand |
Map the turnout before you open the glue
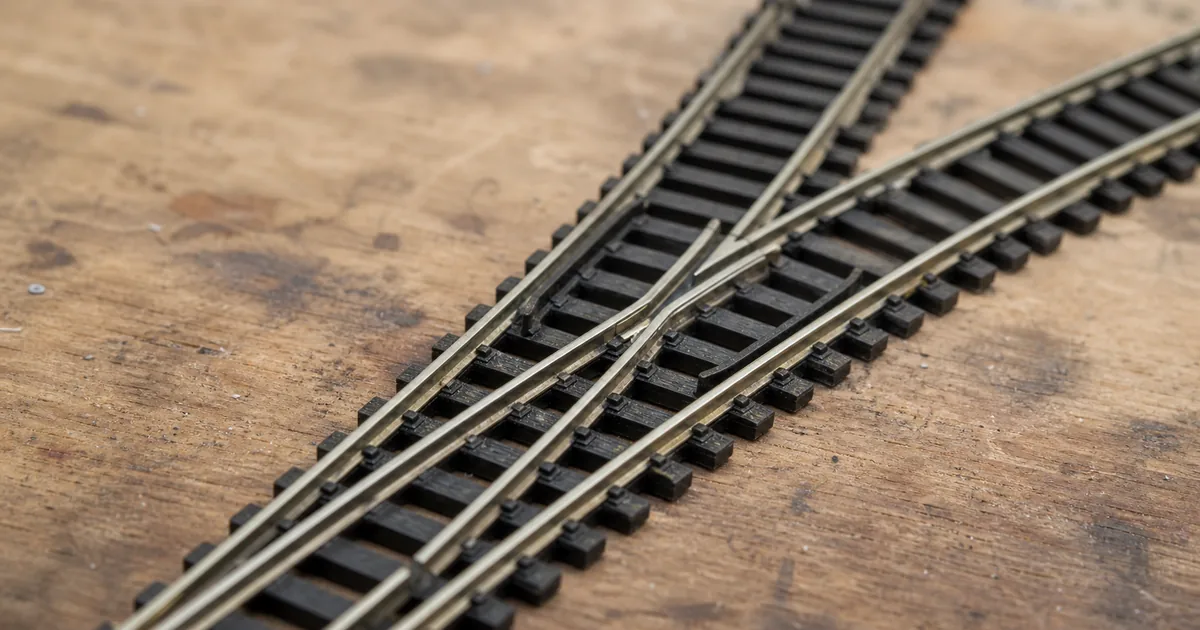
In British model-railway language, a turnout is often called a set of points. The name changes; the mechanism does not. The NMRA ballast guidance gives specific particle exclusions: between frog and wing rails, between guard and outer stock rails, between the final roughly 25% of each switch point and its stock rail, and around the throw bar. It directs adhesive away from the throw bar and switch points. Woodland's S928 instructions use the broader warning to keep adhesive and ballast away from switch points, throws and frogs.
| Zone | Typical locations | ROKHELM decision rule |
|---|---|---|
| Green | Proven straight track and fixed shoulders well away from moving or electrical parts | Normal controlled application after the Go/No-Go check passes |
| Amber | Joiners, feeders, insulated gaps, detector sections, bridge decks, section boundaries and access hatches | Use the minimum material and preserve inspection or removal |
| Red | NMRA particle exclusions plus switch points, throw bar, operating slot, flangeways, exposed contacts and mechanism openings | No particles and no adhesive under our conservative gate |
Important attribution: the all-red “no particles, no adhesive” overlay is ROKHELM's conservative decision rule, not a claim that the NMRA and Woodland use identical wording for every component. If the exact turnout manual is stricter, follow the manual. If a turnout behaves abnormally after nearby work, disconnect power and inspect it rather than forcing the drive.
For the parts being protected, see the KATO #4 versus #6 turnout guide or the TOMIX Fine Track point guide.
Pre-glue Go/No-Go: earn the right to seal the track
This is the point at which most rework can still be avoided. The answer is No-Go if any one item below is unproven:
- Geometry: the longest, widest and longest-wheelbase vehicles pass in both directions without rubbing or lifting.
- Turnouts: every route changes fully and passes at the lowest stable speed, pulled and propelled where that is a normal operating move.
- Power: feeders, joiners, insulated gaps and detection sections have been checked under realistic load.
- Access: under-board drives, bridge sections, module joints and inspection hatches remain reachable.
- Sample: the exact ballast, adhesive, base and applicator have dried to an acceptable color, hold and removal behavior.
- Protection: green, amber and red zones are visibly marked before liquid enters the area.
If the track plan is still changing, stop here and return to the track-planning guide or test the geometry in the track planner. Ballast should record a proven decision, not hide an unresolved one.
How to ballast N scale track in six steps
1. Prove the track and turnouts before scenery
Fix the track by its intended method, complete the wiring, and test the longest and most demanding vehicles in both directions. Check turnout movement, rail joints, feeders, insulated sections, clearances and every normal operating move. Do this before ballast, paint or adhesive can disguise the cause of a fault.
2. Make a sample board and mark the zones
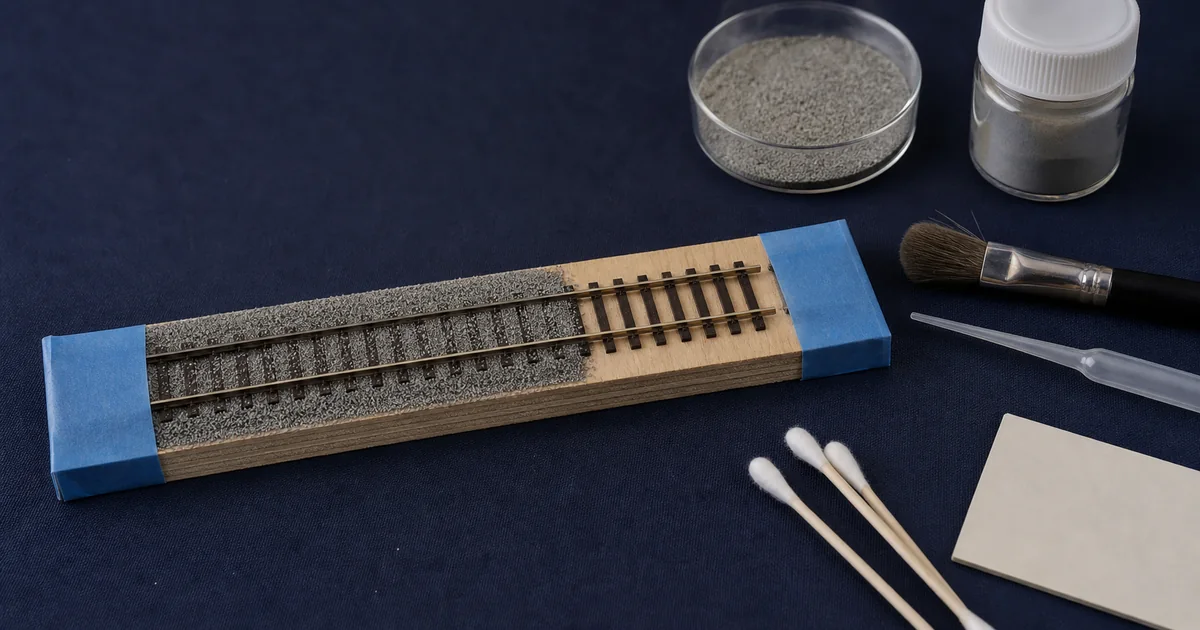
Use the exact ballast, adhesive, base, paint and applicator on a short sample. Let it complete the full process before judging color, penetration, strength or reversibility. On the layout, mark green, amber and red areas around turnouts, joints, feeders and access points; masking a red zone is often clearer than relying on memory.
3. Spread and dry-groom the ballast
Apply a little at a time with a spoon or controlled dispenser. Shape the shoulder with a dry soft brush, working along the track rather than blasting across it. Clear the rail top, tie tops and flangeways, then inspect every turnout red zone under strong light. Do not continue until loose grains are exactly where they should be.
4. Apply the identified adhesive by its own instructions
Follow the branch chosen in the adhesive table. KATO 24-391 does not require pre-wetting. Woodland S191 is ready to use and must not be diluted; Woodland's ballast instructions mist and then saturate with Scenic Cement. The NMRA generic PVA example uses wet water, then PVA thinned only to milk-like consistency. Whichever route applies, introduce liquid gently so the layer is not displaced.
5. Leave it unpowered until fully dry
Do not use a place name or a generic “overnight” claim to guess the time. Use the exact product's guidance, the sample, actual layer thickness, temperature, humidity and ventilation. The NMRA says overnight for its own diluted-PVA method, but that time does not automatically transfer to KATO, Woodland or another product. Keep the section unpowered while any wet, dark or soft area remains.
6. Clean the rail and run a three-stage test
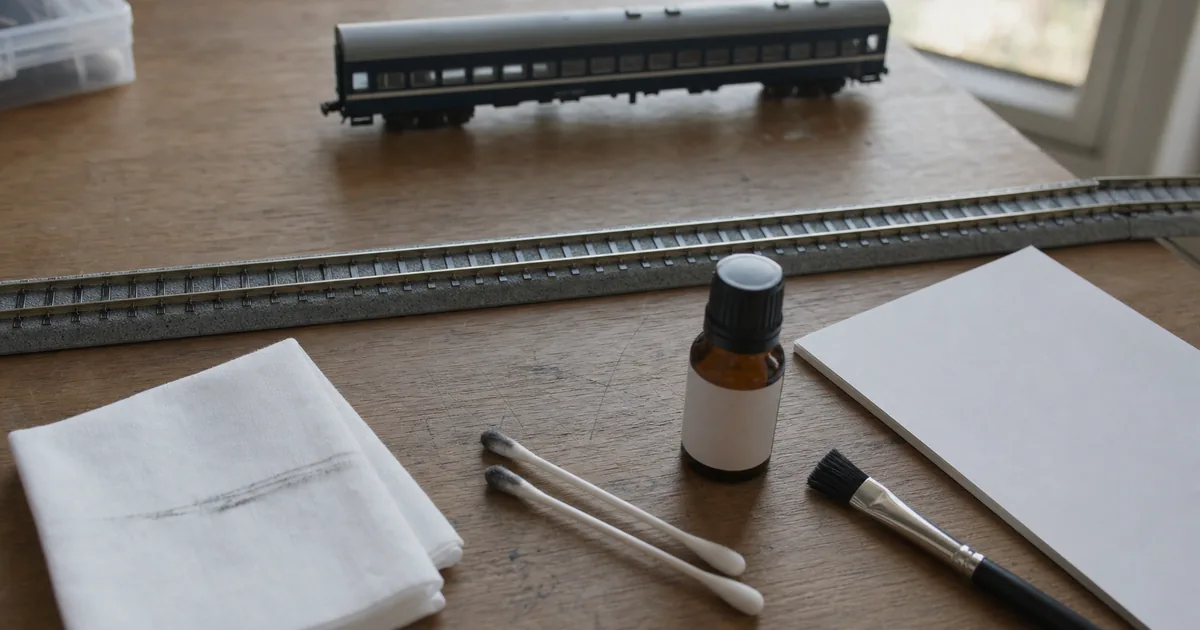
Remove protection, clear the rail top and flangeways, and confirm each turnout moves freely by hand or by its specified control. TOMIX advises cleaning the rail surface with a cloth carrying the proper track cleaner; follow the exact track maker's method. Then hand-roll a suitable vehicle, run one locomotive at low speed, and finally run the full train in both directions. Stop at the first new hesitation, noise or mechanical resistance.
Troubleshooting without guessing
| What you see | Check first | Safer next move |
|---|---|---|
| Grains move when liquid arrives | Applicator force, dry grooming and whether this adhesive requires a pre-wet step | Stop, restore the dry layer and prove a gentler label-compliant method on the sample |
| A pale or glossy surface appears after drying | The exact adhesive, local water, application amount and material compatibility | Do not diagnose by appearance alone; test the maker's remedy on the sample before treating the layout |
| Running becomes intermittent | Rail top, wheel treads, joiners, feeders, turnout contacts and flangeways | Clean and test one variable at a time with the maintenance sequence |
| A turnout does not complete its travel | Point gap, throw bar, slot, flangeways and visible grains or adhesive residue | Disconnect power, remove loose material and follow the exact turnout instructions; do not force the drive |
| The color looks wrong in the layout | Lighting, dry-versus-wet color, prototype reference and surrounding scenery | Change the sample before changing the full line; do not bury a mismatch under more glue |
Railway culture · maintenance logic
Real ballast is not decoration: the tamping cycle explains the model
On a real railway, ballast supports the sleepers, helps hold track geometry and must continue to drain. JR East describes a Multiple Tie Tamper packing ballast beneath sleepers so they are fixed in the correct position, followed by a Ballast Regulator that restores the bed profile, promotes initial settlement and removes stone from sleeper tops. RTRI also reports that traffic and repeated tamping can break particles into fines; drainage and strength can then fall as water retention rises. That history suggests a modelling rule: ballast shoulders, clean tie tops, drainage paths and maintenance access should look intentional, not like a uniform layer of decorative gravel.
Official and first-party sources
Last checked 2026-08-09. Product handling statements are limited to the named product and source. The particle-size conversion is arithmetic from one Japanese technical example, not a global purchasing standard. The source list below matches the citations declared in the Article structured data.
- NMRA: Beginner's Guide Part 4 — Laying Track — track fixing, wiring and the sequence before ballast.
- NMRA: Beginner's Guide Part 6 — Scenery — the generic PVA example and precise turnout exclusions.
- Woodland Scenics: S191 Scenic Cement — ready-to-use status, wetting agent, rail cleaning and product-specific removal.
- Woodland Scenics: S928 instructions — keeping adhesive and ballast away from points, throws and frogs.
- Woodland Scenics: ballast instructions and scale chart — brand-specific Fine, Medium and Coarse guidance and product warnings.
- KATO: ballast series and 24-391 Ballast Glue — Nano and Small product families and no-pre-watering method.
- TOMIX: Fine Track use and maintenance — rail connection, operation and cleaning.
- KATO Special: What is N gauge? — 9 mm gauge and Japanese 1:150 / 1:160 context.
- RTRI: ballast-particle technical example — the cited approximately 20–60 mm real-particle range.
- RTRI: deterioration of fouled ballast — breakage, fines, water retention and drainage effects.
- JR East: MTT and Ballast Regulator reference — the distinct maintenance roles summarized in the culture section.
N scale ballasting FAQ
How do you ballast N scale track?
First fix, wire and fully test the track without ballast. Make a sample board, mark turnout and maintenance exclusion zones, dry-spread and brush the ballast, then apply the specifically identified adhesive exactly as its manufacturer directs. Keep power off until it is fully dry, clean the rail top and flangeways, and test by hand, with one locomotive, then with the full train.
What size ballast should I use for N scale?
Do not treat Fine, Medium, Nano or Small as universal measurements; they are brand-specific names. Check the maker's scale chart and actual particle size, then compare the result with photographs of the route and era you model. As a scale reference only, a Japanese technical example of 20–60 mm real ballast becomes about 0.125–0.375 mm at 1:160.
What is the correct glue-to-water ratio for ballast?
There is no cross-brand ratio. Woodland S191 is ready to use and should not be diluted; KATO 24-391 has its own no-pre-wetting method; a concentrate must follow its own label. In the NMRA's generic PVA example, water is added only until the mixture is about the consistency of milk, not to a fixed 1:1 or 1:3 formula.
Do I need wet water before applying ballast glue?
Only when the chosen method calls for it. The NMRA's generic diluted-PVA method uses wet water first, but KATO states that its 24-391 ballast glue needs no pre-watering. Woodland S191 already contains a wetting agent and its ballast instructions use Scenic Cement itself for the mist-and-saturate sequence. Follow the exact product, not a universal habit.
Should Woodland Scenic Cement be diluted?
No. Woodland identifies S191 Scenic Cement as a ready-to-use product that contains a wetting agent and requires no dilution. Its instructions also say to clean the rails before use. Do not add water or dish soap to S191 unless a future manufacturer instruction for that exact product explicitly says otherwise.
Can I add ballast to KATO Unitrack?
Yes, for a more natural shoulder and color transition, but Unitrack already has molded roadbed and does not need loose ballast for basic operation. Keep joiners, feeders and module boundaries serviceable, and test a removable section first if the layout must be taken apart. KATO sells ballast intended for use around Unitrack.
Where must ballast be kept away from a turnout or set of points?
The NMRA says to keep ballast out between frog and wing rails, between guard and outer stock rails, between the final roughly 25% of each switch point and its stock rail, and around the throw bar; adhesive must stay away from the throw bar and switch points. ROKHELM's more conservative gate treats all those red areas as no-particle, no-adhesive zones.
Should I move the turnout while the adhesive dries?
If you used the NMRA diluted-PVA method near a turnout, the NMRA advises moving the throw bar periodically while the adhesive dries. That is a backup check, not permission to put adhesive on moving parts. Keep the points, throw bar, flangeways, contacts and mechanism clear, and follow the instructions for the exact turnout.
How long should ballast adhesive dry?
Use the exact product's recoat and full-dry guidance, the depth of the layer, room conditions and the sample board. The NMRA says overnight for its own diluted-PVA workflow, but that is not a universal time for KATO, Woodland or another adhesive. Leave the track unpowered until there are no wet or soft areas and the turnout moves freely.
Should track and ties be painted before ballasting?
Usually yes, if weathering is part of the plan. The NMRA recommends painting or weathering rails and ties before ballast because later paint can also coat the stone. Keep paint off the rail top, moving point contact surfaces and electrical contacts, then test the track again before the ballast stage.
How do I stop ballast from moving when I apply adhesive?
Start with a completely dry, carefully brushed layer and use the applicator and sequence specified for that adhesive. Place liquid gently near the surface instead of hitting the ballast with a hard jet. If the chosen method requires pre-wetting, do it evenly; if it is KATO 24-391, do not add that step. Prove the technique on a sample board first.
Can glued ballast be removed later?
Sometimes, but removal cost and damage risk depend on the adhesive, track and base. Woodland says S191 can be softened with warm soapy water and, if needed, denatured alcohol; that advice belongs to S191, not every glue. If future track changes matter, leave joints and access points unsealed and test reversibility on a sample before the layout.