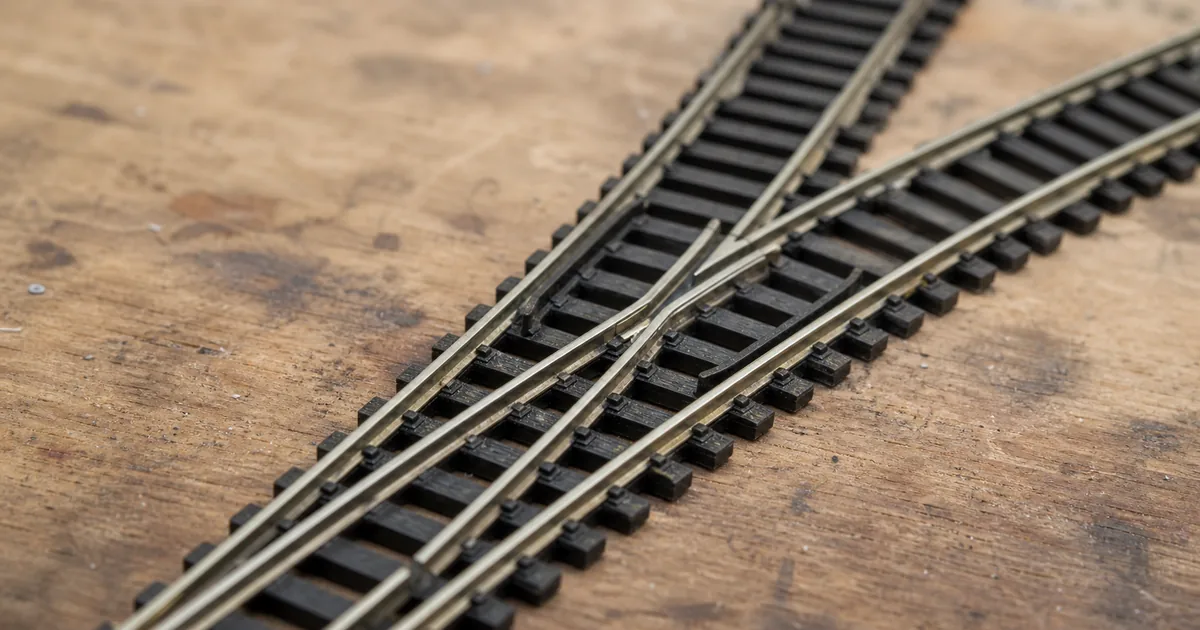
Scope: current KATO N-scale UNITRACK electric #4 turnouts 20-220/221 and #6 turnouts 20-202/203. Exact package instructions override this comparison.
A turnout is not chosen by one number. It must fit the complete geometry, the vehicles that will use it, the intended power behavior and the maintenance space around it.
#4 versus #6: verified comparison
| Field | KATO #4 | KATO #6 |
|---|---|---|
| Left/right SKUs | 20-220 / 20-221 | 20-202 / 20-203 |
| Diverging geometry | R481, 15° family | R718, 15° family |
| KATO USA planning length | 124 mm | 186 mm |
| Maker positioning | Compact; useful where space is limited | Broad radius for faster passage |
| Power behavior | Selective/non-selective; factory selective | Selective only |
| Package boundary | Turnout plus listed auxiliary track | Single turnout; verify additional pieces |
| Remote operation | Separate control switch | Separate control switch |
The old page said 126 mm for #4. KATO USA's geometry material shows 124 mm, so this page now follows the first-party drawing. Neither length is a layout footprint: following curves, parallel roads and clearance extend it.
Why the number cannot replace geometry
NMRA defines turnout number from the frog ratio. KATO publishes R481 and R718 sectional geometry for these products. Those are different claims. Use KATO's drawings for a UNITRACK plan; do not import an NMRA #4 or #6 template and expect the same exit geometry.
NMRA RP-11 says a turnout specified by radius should be consistent with the equipment's radius requirements. That is not a guarantee that every car cleared for an ordinary R481 curve will negotiate every #4 formation. Approach, reverse curve, joints, gradient and propelled movement can change the result.
Tool 1: five-gate turnout decision
| Gate | PASS | HOLD / redesign |
|---|---|---|
| Exact product | Correct SKU, hand and current instructions | Only “#4/#6” or photo known |
| Vehicle | Required trains documented and selected for test | Longest/lightest/short-wheelbase unknown |
| Geometry | Approach, following curve, centres and clearance drawn | Only bare turnout fits |
| Electrical job | Power behavior matches section plan | Plan requires non-selective #6 |
| Access/test | Mechanism reachable and every route passes | Scenery seals access or fault remains |
Selective and non-selective behavior
KATO says #4 can be set selective or non-selective. Selective powers the selected route; non-selective keeps both routes powered. All UNITRACK turnouts leave the factory selective. KATO explicitly says #6 cannot be set non-selective.
Do not modify #6 from an unofficial workaround. If both branches must remain powered, design feeders and blocks using the controller or DCC maker's instructions. See the DCC guide and feeder guide.
Tool 2: one-turnout acceptance ledger
| Record | Observation | Pass |
|---|---|---|
| Route/position | Straight/diverging, selected/unselected | Position and intended power agree |
| Vehicle | Longest, lightest, short-wheelbase, normal train | No repeated climb, bind or uncoupling |
| Move | Both directions; hauled/propelled if real | Every required move succeeds |
| Pickup | Motor, lights and sound at low speed | No repeatable turnout stall |
| Throw cycle | Points fully seat repeatedly | Reliable after several cycles |
Repeat the same conditions after rejoining track and before ballasting. Keep adhesive and particles away from moving and wheel-contact areas according to the turnout and scenery-product instructions.
Six-step workflow
1. Record the turnout and operating job
Write down left or right hand, exact part number, intended route, normal direction and the trains that must use it.
2. Check vehicle and route evidence
Use each vehicle's instructions for curve limits, then identify the longest, lightest and shortest-wheelbase vehicles for the acceptance test.
3. Draw the complete geometry
Draw the turnout, approach, following curve, parallel-track centres and clearance; do not compare only the bare turnout length.
4. Choose the documented power behavior
Leave the factory setting unless the plan requires otherwise: KATO permits selective or non-selective operation on #4, while #6 remains selective.
5. Dry-lay and run the acceptance test
Before fixing track or scenery, test every route at low speed in both directions, hauled and propelled where that is a real operating move.
6. Record the result before fixing track
Log vehicle, route, direction, speed and power result; resolve any repeatable stall, wheel climb or unwanted dead section before permanent work.
Real railways manage turnouts as maintained equipment
RTRI reports a method that analysed inspection records from 280 point machines and evaluated failure risk before changing inspection intervals. The model inference is modest: identify each turnout, record repeatable results and keep it accessible. A #6 label does not replace inspection.
Railway culture: full-size railways manage point machines through location-specific records and risk. .
Official and first-party sources
Fact-checked 2026-08-15. Product pages can change; use instructions packed with the exact SKU.
- KATO Japan — electric turnouts
- KATO UNITRACK — branch/crossing track
- KATO FAQ — power settings
- KATO USA — #4 geometry
- KATO USA — UNITRACK catalogue
- KATO USA — #4/#6 operating notes
- NMRA — turnout number glossary
- NMRA RP-11 — curvature and rolling stock
- RTRI — point-machine inspection analysis
KATO #4 and #6 FAQ
What is the main difference between KATO #4 and #6 turnouts?
The #4 uses an R481 diverging curve and compact 124 mm planning geometry; the #6 uses gentler R718 geometry and occupies 186 mm. The other decisive difference is electrical: #4 can be set selective or non-selective, while #6 cannot be set non-selective.
Is a KATO #6 the same as an NMRA #6 turnout?
Do not assume so. NMRA defines a turnout number from the frog ratio. KATO publishes the actual R481 or R718 sectional geometry for its products. Plan with the maker's dimensions and a full-size track drawing, not frog-number arithmetic transferred from another system.
Which KATO turnout takes less space?
The #4 is compact, but compare the complete formation. Its 124 mm turnout, auxiliary pieces, following curve, track centres and clearance determine the real footprint. A bare-body length does not prove how much space a yard ladder or crossover saves.
Is the KATO #6 always more reliable than the #4?
No universal guarantee follows from the number. KATO USA notes that short-wheelbase or underweight stock may be more prone to derail on #4 and describes the #6 divergence as gentler. The result still depends on the exact vehicle, approach, joints, level, speed and direction.
What comes with a KATO #4 turnout?
KATO lists #4 with auxiliary track: 64 mm straight pieces, an R481-15 curve and dedicated 60 mm cut-side straight pieces. A separate turnout-control switch is still required for remote operation. Check the current package and manual for the exact market SKU.
Does a KATO #6 include matching curves or a control switch?
KATO lists the #6 single item as one turnout. Do not infer that a matching curve, straight or turnout-control switch is included because a track set contains those pieces; check the specific package contents.
Can a KATO #4 be set to non-selective power routing?
Yes. KATO's FAQ says electric #4 turnouts can be set to selective or non-selective operation. They leave the factory selective, and KATO says the normal selective setting is suitable for ordinary use.
Can a KATO #6 be set to non-selective power routing?
No. KATO's FAQ explicitly says #6 turnouts cannot be set to non-selective operation. Do not disassemble or modify one based on an unofficial workaround; design feeders and operating sections around the documented behavior.
Can both KATO #4 and #6 turnouts be used on DCC?
They can be part of a DCC layout, but that does not make their electrical behavior identical. KATO links non-selective operation with simultaneous multi-train control and advises checking the digital-system maker's recommendation. Plan feeders, districts and protection for the actual system.
Should I use #4 for yards and #6 for main lines?
Treat that as a planning starting point, not a rule. KATO describes #4 as useful where space is limited and #6 as a broad-radius turnout for faster passage. The final choice must also pass vehicle instructions, complete geometry, electrical behavior and an acceptance test.
Do I need extra feeders around a KATO turnout?
That depends on the route, selected power behavior, block or DCC district plan and controller instructions. Verify voltage and continuity on every route in every switch position; add only documented feeder or isolation components needed by that plan.
How should I test a turnout before ballasting?
Dry-lay it and use the actual longest, lightest and shortest-wheelbase vehicles. Test each route at low speed in both directions, hauled and propelled where applicable, while checking point movement and power. Fix every repeatable fault before adhesive or scenery.